Santa’s Wish List is Here — And He’s Shopping Local This Year
We love our families. We love their creativity. We love the candles, the socks, the brewing books we already have… 😅
But let’s be honest: they don’t always know their hydrometers from their hoses. And picking the right fermenter, yeast strain, or weldless fitting? That’s tricky even for seasoned brewers.
That’s why Perfect Brewing Supply now has a direct line to the North Pole. Introducing → Santa’s Wish List!
How It Works (And Why You’ll Love It)
This year, skip the guessing games. Fill out a wish list with the gear, gadgets, ingredients, or classes you’ve been eyeing, and leave it with us at the shop.
Then?
✨ Your friends and family can stop in and shop straight from YOUR list. They get to feel like holiday heroes… and you get exactly what you actually want for your inner brewer, baker, or fermenter.
Bonus: Bring Back Your Wish List & Get Gifts Now!
To sweeten the deal, if you fill out your list and leave it here at Perfect Brewing Supply, you’ll walk away with:
🎉 FREE sample of Santa’s Magic (our holiday-themed brew) 💸 $5 Gift Card toward your next visit
Yep—that means you start getting holiday gifts before Santa even loads the sleigh.
Who Is This For?
If you: ✔ Are tired of pretending you “love” mystery kitchen gadgets ✔ Have a brewing project in mind but can’t justify buying everything at once ✔ Want your family to feel awesome for picking the “right” gear ✔ Prefer wort over sweaters, and stainless steel over scented candles
Then this list was made for you.
📥 How to Get Your Wish List
🎅 Download it by clicking the button below (print it, fill it out) 📍 Bring it to Perfect Brewing Supply
➡️ We’ll hang it up at the shop for Santa’s helpers to see.
And yes—the freebies are waiting when you do.
This Year, Let’s Make Everyone a Holiday Hero
Your family wants to get you something amazing this year. They just need a little help from the pros.
Let Santa know exactly what belongs in your stocking… and we’ll make sure it ends up there.
Download your Santa’s Wish List. Bring it in. Get gifts. 📍 Available now at Perfect Brewing Supply.
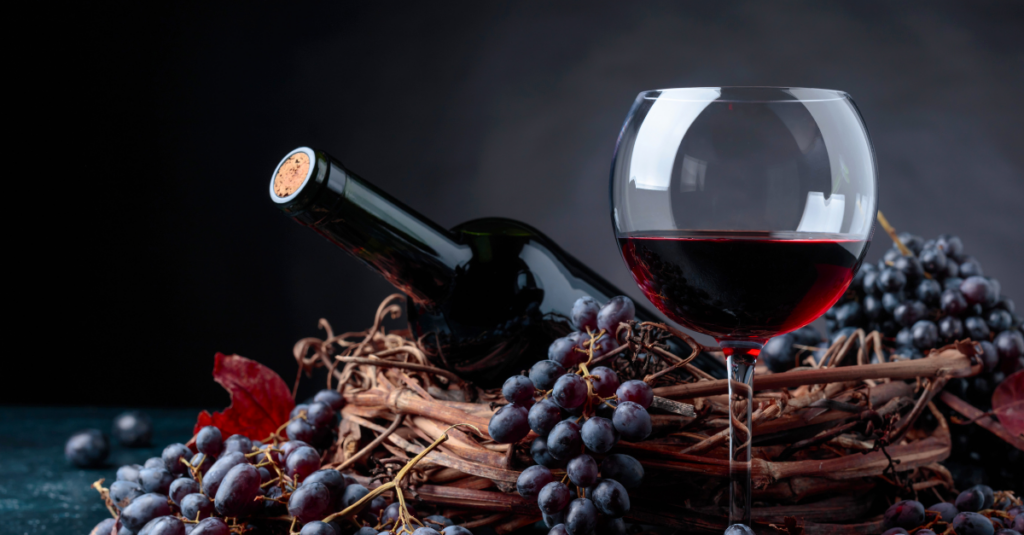
One of the most rewarding steps in winemaking is reaching that moment when your wine is finally ready to be bottled. But how can you be sure it’s time? It’s a question that we are asked often.
Bottling too early can lead to unfinished flavors, while waiting too long might risk oxidation. Here’s a guide to help you determine when your wine has reached peak readiness.
1. Tasting and Aroma Development
Regular tasting throughout the aging process gives you a direct line to your wine’s development. Pay attention to both flavor balance and aroma—if the wine tastes smooth, complex, and well-rounded, this is a good sign it’s close to being ready.
You’re looking for harmony, where no single element (like tannins or acidity) overwhelms the others. We have been told that before the invention of many instruments to measure acidity or anything else, THIS is what makes a winemaker, a winemaker.
2. Clarity and Stability
Two essential factors to check off before bottling are clarity and stability:
Clarity: Any cloudiness or haze means your wine may still have particulates that need to settle or be filtered out. Clear, transparent wine typically signals that it’s ready.
Stability: Stabilizing the wine prevents unwanted fermentation from restarting in the bottle. Testing for pH and acidity levels to ensure they’re within a stable range is essential for a wine that will age well in the bottle. (If you aren’t certain on how to check the ph and/or acidity of your wine then contact the shop and we can walk you through this process.)
3. Final Adjustments and Sulfite Levels
The bottling stage is the perfect time for any last tweaks. Assess if the wine needs slight adjustments to its acidity or sweetness for an ideal flavor profile. Also, check the sulfite levels to make sure there’s adequate protection against oxidation and bacteria. This small but crucial step helps preserve the wine’s quality and shelf life.
4. Managing Gas Levels
Nothing ruins a great wine like unexpected bubbles in a still bottle. Degassing the wine removes any residual CO₂ that may cause fizziness or even pop a cork unexpectedly. When making still wine, make sure it’s properly degassed so your bottles remain stable.
Do we use a drill attachment to degas our wine? Yes, yes we do. Want to know how? Come by the shop and we can share the different ways we degas our wine.
5. Testing and Trial Bottles
If you’re uncertain, consider a test bottling of a few bottles to see how the wine holds up over a short period. This can give you insights into any last adjustments needed before the entire batch is bottled.
Bottling Preparation Tips
Once you’re confident your wine is ready for bottling, don’t overlook the essentials of preparation:
Sanitize all bottles and equipment: This prevents contamination, preserving the quality of your wine.
Set up in a clean, dust-free area to avoid any impurities.
Make sure your labels and packaging are ready so you can store your bottles right after bottling.
The Bottom Line
Determining when your wine is ready for bottling is all about experience and a careful eye for detail. Trust your palate, check your clarity and stability, and follow these steps to ensure every bottle captures the best of your hard work.
The Kentucky Common used to be all the rage in the place for which it is named, especially in Louisville. It was almost all that was brewed and consumed at local pubs and restaurants. That is until, of course, Prohibition. Sensing a theme in this series?
Prohibition did not stop people from drinking alcohol, but it did make people reach for the more potent and concentrated alcoholic beverages (it was easier to hide one bottle of a spirit than a case of beer). This was incredibly damaging to American beer culture, since consumers weren’t ordering a pint anymore, breweries, even illegal ones at the time, weren’t able to keep their brewing skills sharp. Indeed, many of them never returned to brewing beer, thus the Kentucky Common style was lost among other local specialties, until the arrival of the homebrewer.
To borrow the parlance of another beer writing org, what even is a Kentucky Common?
What is a Kentucky Common?
Well, in essence, it is an amber/brown cream ale. That’s right, it’s a dark cream ale.
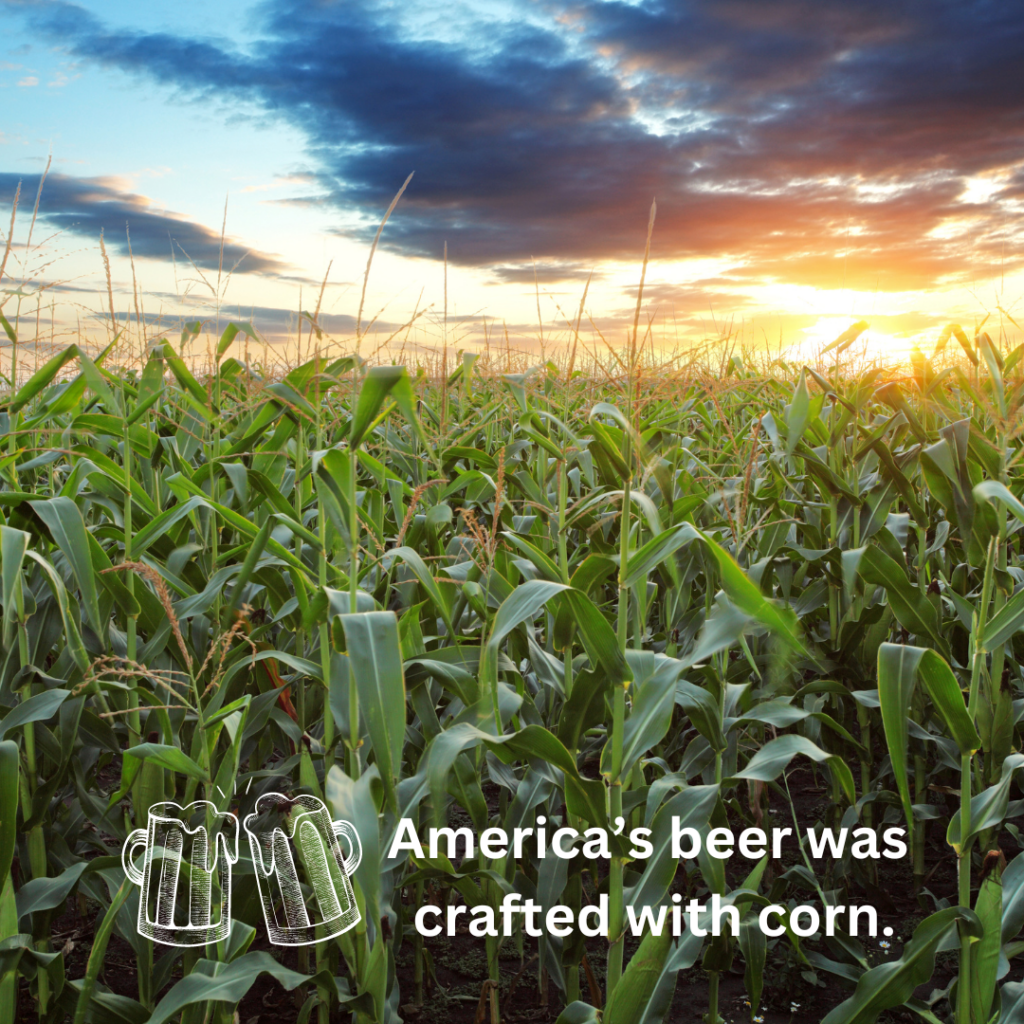
As we know, the cream part of the name cream ale comes from the hefty addition of corn to an otherwise regular ale, which the Kentucky Common also does not shy away from. It has upwards of 30% corn in the grist makeup, resulting in the lightest of ales. Couple that with a high carbonation and you’ve got one creamy Kentucky Common.
This should not be confused with the common off-flavor called DMS (dimethyl sulfide), which some associate with a corn-like taste in beer. DMS doesn’t actually come from corn but rather from lightly kilned malted barley. Fortunately, you can easily address this by extending your boil time from 60 minutes to 90 minutes.
Now what makes Kentucky Common a ‘dark’ cream ale?
Well that would be due to a touch of caramel malt added and also some black malt. It is speculated that those roasted malts were added to a regular cream ale to assist with the harder water in Louisville. To briefly touch on some water chemistry, the reason the caramel and black malt helps has to do with pH.
Hard Water vs. Soft Water
Hard water can have a much higher pH than soft water, leading to a higher pH in the finished beer, which can negatively impact its taste. A lower pH in finished beer is often associated with crispness. Caramel malts and black malts added to a Cream Ale contribute to the flavor, but more importantly, they are roasted to a point that makes them more acidic. This acidity from the malts helps lower the overall pH of the beer, bringing it back to a desirable and tasty range.
A Throw Back Carbonation Trick
Kentucky Common has another unique historical feature: it was naturally quite creamy, much like Cream Ale. This creaminess refers to the mouthfeel, enhanced by a high level of carbonation. Breweries in Louisville achieved this by packaging the beer before it had finished fermenting.
They would rack (move) the beer from their larger fermentation vessels into tightly sealed barrels. As the yeast finished fermenting, all the Co2 that it created had nowhere to go and would naturally carbonate the beer in the barrels.
These barrels were then rolled out into pubs and saloons all over Louisville and tapped so that patrons might enjoy freshly carbonated ale, with lots of bubbles and head.
Pre-prohibition this would have been one of the only ways to enjoy beer, unless you were making it yourself at home. And what a fun way to drink beer and enjoy the camaraderie of your community!
Meat. And. Potatoes. Time.
BJCP Style Guidelines
The BJCP Style Guidelines list the stats of Kentucky Common as the following:
IBU: 15 – 30
SRM: 11 – 20
OG: 1.044 – 1.055
FG: 1.010 – 1.018
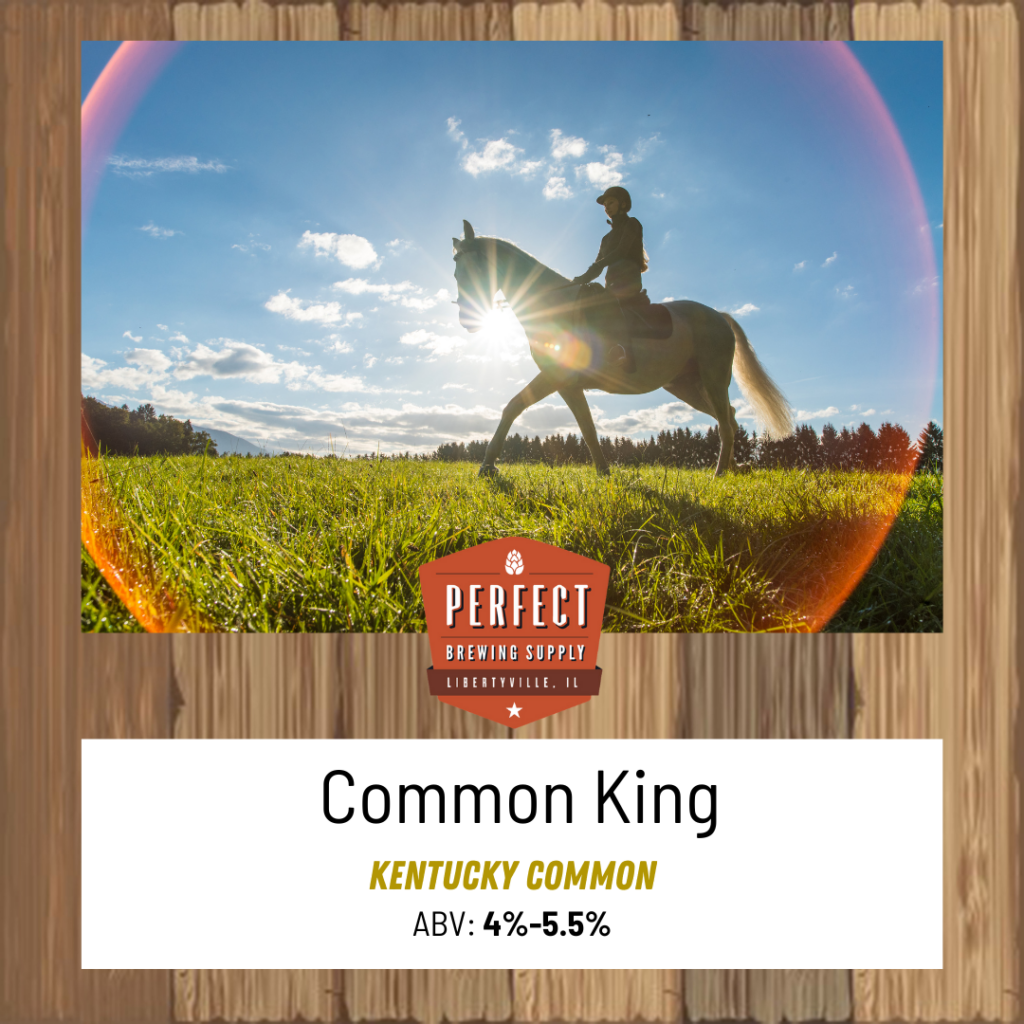
ABV: 4% – 5.5%
Here is our recipe for our Common King, a Kentucky Common:
Grains: 6.5 lbs 6-row
2.5 lbs Flaked Corn
0.5 lbs Caramel 80
0.25 lbs Black Malt
Hops: 1 oz Willamette, 1 oz Spalt
Yeast: OYL-004 Omega West Coast Ale I
A Common Thread in this Series
If you read the previous blog in this series, this recipe should be quite familiar to you. (If not, click that link to read it.) It uses the same highly prevalent 6-row that was ubiquitous in America pre-prohibition. It also has a hefty helping of flaked corn, which most beer made in America utilized back then for easy sugars to ferment into alcohol.
The amount of those grains have been reduced, however, to produce a more “sessionable” beer, which was historically Kentucky Common. In fact, it was one of the first session beers in America and was meant to be drunk fresh and in quaffable quantities.
Then we used a classic American hop, one of the first, which is a daughter of a traditional English hop, Fuggle. For aroma we use a German hop for a nice floral and slightly spicy character. This would have been used by the German brewers making the beer.
For yeast, we use the all-star Chico strain from Omega Yeast, that is OYL-004, West Coast Ale I for all clean fermenting American beer styles.
A forgotten American beer style, almost lost to the annals of history, save for the occasional spot on the taplist of the modern craft brewery.
What is a Pre-Prohibition Pilsner? Also referred to as a Pre-Prohibition Lager, the Pre-Pro Pilsner (as it shall henceforth be spelled, to save your breath and mine) is a lager that was commonly brewed in the era before the 1920s Prohibition in America.
It is noted for being extremely light in flavor and crisp. The high carbonation adds a full mouthfeel to the beer in an otherwise simple and delicate palette. Pre-Pro Pils is the grandmother to what we call today the American ‘Macro Lager,’ like Budweiser, Miller, and Coors.
Like the California Common, this lager was brought to America via German brewing immigrants that specifically utilized their clean fermenting lager yeast strains from the motherland. In particular, they seemed to settle mostly in the Midwest, as we can see today with all of the German influences in Wisconsin and Northeastern Illinois.
The Lakes Drew Them…
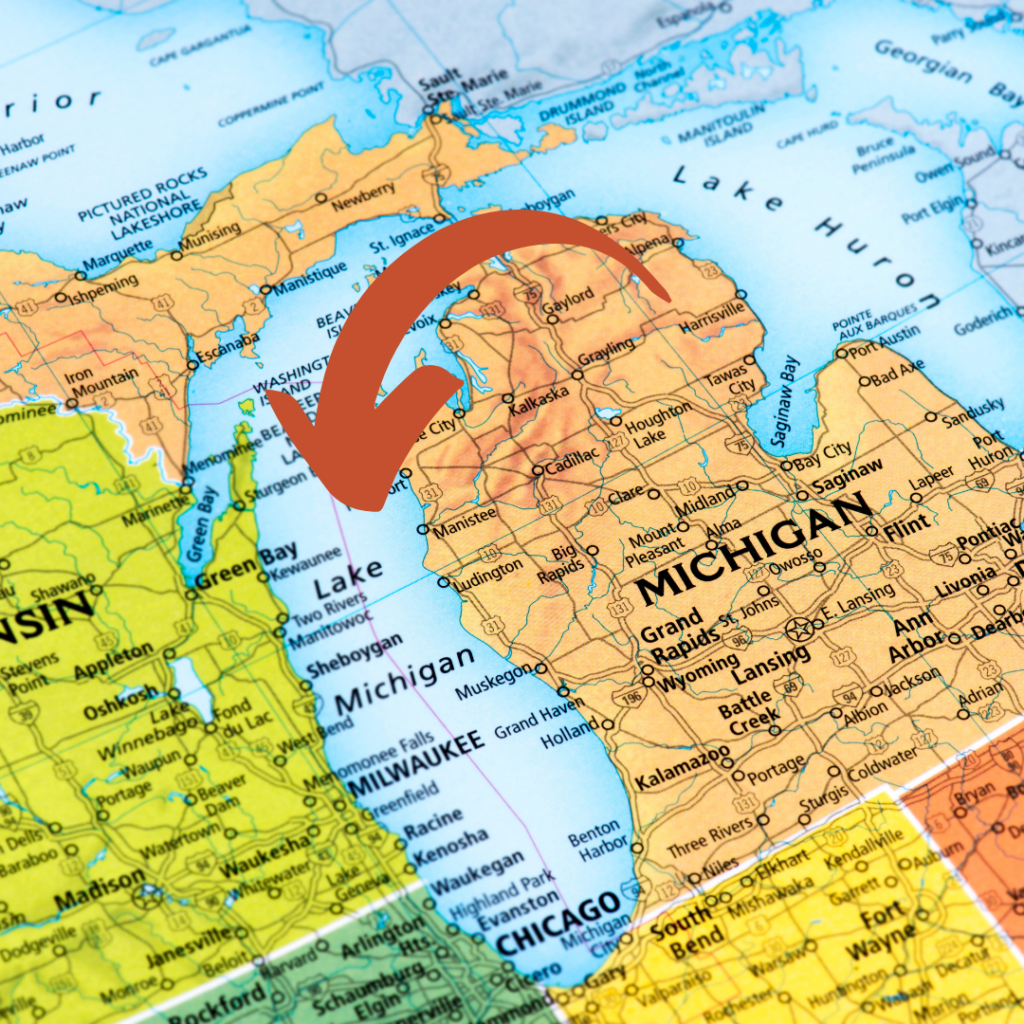
What drew them to this region of the country was probably not what you would expect. It certainly wasn’t the barley, as we learn about later in this blog. It was in fact, the water. I know! It’s the most overlooked ingredient that every homebrewer learns about last in their journey to making great beer. For the Germans flocking to a new country, however, the water was the most critical part of brewing their precious lager, and the Midwest had the best water in the form of The Great Lakes.
Those humongous bodies of water provided an incredible source of fresh, clean, drinking, and indeed brewing, water. The water from The Great Lakes, and specifically Lake Michigan, is known to be extremely soft. Soft water sits opposite hard water.
You know that feeling when you take a shower at grandma’s, and are bombarded with a rough, almost rocky texture on your skin? That is hard water, which is loaded with extra minerals, like calcium, magnesium, and sulfates. Often hard water comes from well or ground water. Soft water in contrast, is relatively free of these minerals that make water feel hard and taste minerally.
Hard or Soft Water? It Matters When You Brew
Hard or soft, both types of water can be used to brew with, but you will have vastly different tasting outcomes in your beer, depending on which you use. The harder the water, the more harsh tasting, minerally, and bitter your beer will taste. Sometimes, as is the case with India Pale Ale, harder water is necessary to balance and smooth out a beer style, perhaps due to the unfathomable amount of hops in it.
For lager brewing, soft water was the name of the game, and there is no place in America with such a soft and abundant source of soft water than the Midwest, surrounded by The Great Lakes.
The lack of minerals in the Midwestern water meant that the German lager yeast, free of fruity esters, has nowhere to hide and needs a blank canvas in order to offer the delicate presentation of hops and malt that it seeks.
Enough about water. We want a recipe!
The BJCP Guidelines
The BJCP Style Guidelines list the stats of Pre-Prohibition Lager (Pilsner) as the following:
IBU: 25 – 40
SRM: 3 – 6
OG: 1.044 – 1.060
FG: 1.010 – 1.015
ABV: 4.5% – 6%
New Recipe! Michi gami Lager
Here is our recipe for the Michi gami Lager, a Pre-Prohibition Pilsner:
Grains: 8 lbs 6-row
3 lbs Flaked Corn
Hops: 3 oz Spalt
Yeast: OYL- 114 Omega Bayern Lager
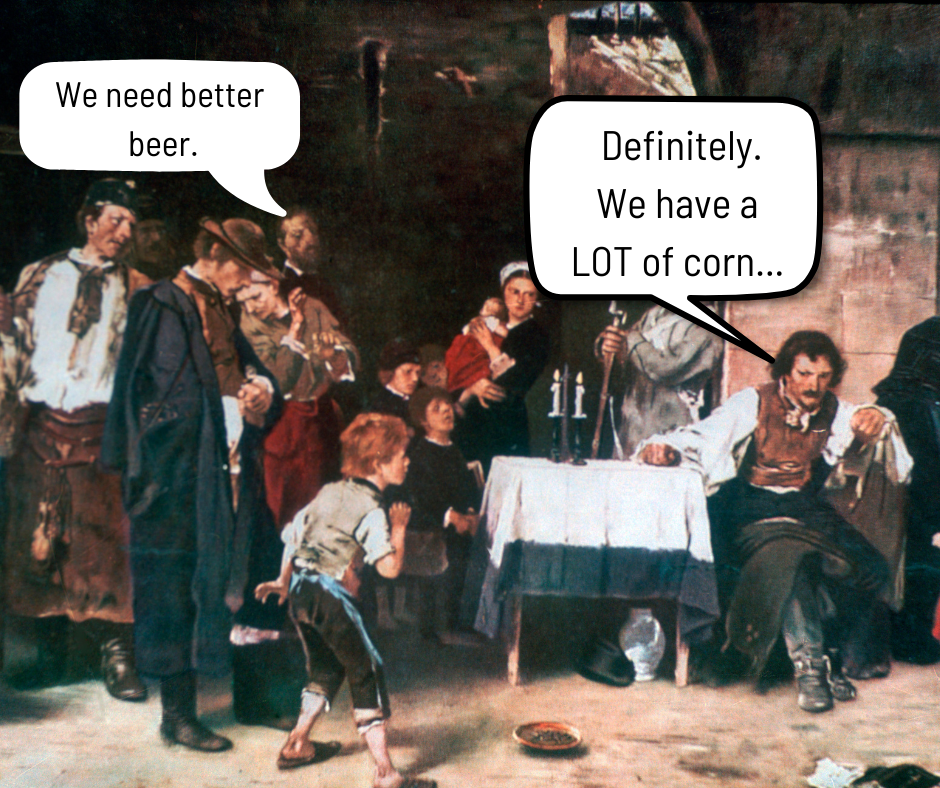
Let’s break down the recipe. We opted for close to a 30% addition of corn here because the US has so much corn, and back then most beers would be made with enough corn to scare the husk off your homebrewing ancestor.
Corn was just so prevalent, and cheap, that you couldn’t not brew with corn back in the day. This led to the ‘weakening’ of many styles of beer brewed in America, at least according to your typical European. However, that meant that many of these styles would begin to take a distinctly American flavor to them, as corn lightened the typical barley malt aroma and taste, but also lent a corn-like sweetness to them as well.
We went with 6-row barley over 2-row to capture that traditional rustic, less white bread/biscuit, malt flavor of the time pre-prohibition. 6-row grew all over America, whereas 2-row from Europe hadn’t quite caught up yet.
Spalt was the chosen hop since it is a traditional Noble hop, from Germany, with floral and spicy notes. This is just like the German immigrants would have cultivated and brewed with in America. Lastly, the yeast chosen is a classic clean fermenting lager strain with a crisp profile from Omega yeast. Not too different from what might have been used pre-Prohibition.
While technically it has been brewed in some shape or form since the 1850s Gold Rush, the version we are familiar with is from the 1970s. This version is considered the first American ‘craft’ beer and is made by one of America’s oldest breweries, Anchor Brewing.
It should be noted that California Common is more widely known as ‘Steam Beer’ because that was what it was called for so long. Anchor revived the style and trademarked ‘Anchor Steam,’ thus creating the need for a different style name.
California Common did not pop out of nowhere, though. Steam Beer has been made by many breweries in and around the San Francisco region for some time now, exactly where Anchor is located. Anchor was one of the only breweries to survive from the 19th century and, in fact, revive the style, so I think we can let them keep the original name.
Image courtesy of thomas.cizauskas.net
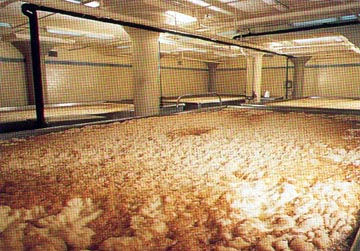
Where did the name Steam Beer come from? It is widely known that Anchor was one of the few American breweries to continue to employ what is called a ‘coolship’. This is a large, shallow tray for pouring your hot boiling wort into. This tray was so wide, and located on the roof of Anchor’s brewhouse, that it had the effect of rapidly cooling the wort by exposing so much surface area of it to the cool Pacific Ocean breeze in San Francisco. Thus letting off a lot of steam.
California Common is an amber colored, malty, moderately bitter, standard strength beer. What makes it truly unique, however, is that it uses lager yeast. Yes, this makes it a lager, but the process derives more flavor than your typical clean fermented lager.
Anchor ferments their Steam Beer with lager yeast, as would have been typical of many German immigrant brewers. They would bring their bottom fermenting lager yeast over to the States, but they do so at ale temperatures. This means that the typically clean, somewhat sulfury lager, is now sulfur-less and has a just perceptible fruity ester character to it. This makes it taste more like an ale, but a far more subtle one.
It is meat and potato time.
BJCP Guidelines for California Common
The BJCP Style Guidelines list the stats of California Common as the following:
IBU: 30 – 45
SRM: 9 – 14
OG: 1.048 – 1.054
FG: 1.011 – 1.014
ABV: 4.5% – 5.5%
Chicago Steam Recipe – All Grain
Here is our recipe for a Cream Ale called Chicago Steam:
Grains: 9.75 lbs 2-row
.5 lbs Caramel 80
Hops: 2 oz Northern Brewer
Yeast: WY2112 California Lager
For hopping, California Common, being as old of a style as it is, does not use any of the newer American, pine/grapefruit hops like Cascade, nor does it use any of the even newer citrusy/juicy hops like Citra. You want a classic old world hop, like Northern Brewer, which has evergreen, wood and mint characteristics. It is the exact hop used in Anchor Steam, which is exactly why we use it in our recipe too.
You’ll notice again that this recipe uses the more flavorful 2-row barley malt, as opposed to the 6-row malt that would have been much more common pre-prohibition. That is because we are following the more modern interpretation of a California Common from the 1970s. If you want to match the gold rush era Steam Beer, then I would suggest substituting out the 2-row for 6-row for a more rustic beer, and probably adding a lb of flaked corn.
Additionally, our recipe comes out at a light amber, whereas the style should be decidedly amber. This is a personal choice and how our recipe has been written since its inception some seven plus years ago. If you want that solid amber color along with adding some complexity in the form of toasty flavors, I recommend adding in a half pound of an amber (20-27L) malt and a half pound of a crystal light malt (38-44L).
A Final Note…Current Status of Anchor Steam
Before I go, I want to cover some current events regarding the California Common, or indeed, Steam Beer. Rather unfortunately, if I were to go looking for Anchor Steam at my nearest bottle shop, I would be unable to find it.
In the Summer of 2023, Anchor Brewing was shut down and waiting liquidation from the holdings of Sapporo. Fear not, however, in late Spring 2024, they were saved by the CEO and founder of Chobani, who purchased the brewery and is set to revive Anchor Steam, again! This marks another chapter of stubborn persistence for the California Common, but even without Anchor Brewing, as homebrewers, we can carry on the style’s truly American legacy in our pots, fermentors, and stomachs.
One of the few completely unique to America beer styles. This style has been brewed since the late 19th century. It was invented here with a purpose, rather than taken from England and then using American ingredients. Much like Munich breweries invented the Helles Lager to compete with the pale Pilsner beers coming out of Czechia in the mid-1800s, the Cream Ale was created for the sole purpose of competing with the American Lager.
As we will explore further in the other entries in our Brewing In America series, German immigrants brought with them Lager brewing techniques and yeast. They created a tour de force of a brewing culture here that the original Ale/Porter brewers from Britain were struggling to compete against.
Using large amounts of the abundant 6-Row barley found in North America, new malting methods capable of creating paler malt, and a plethora of corn, ale brewers were able to produce a straw-yellow beer. This beer had fewer malty toast aromas than their pale ale and porter cousins across the pond in Britain. The softer and lighter malt flavor mimicked the cracker and white bread flavors found in continental 2-row pilsner malt. This was evident in the American Lager that was taking the continent by storm. Yeast selections changed to ale yeasts that are ‘cleaner’ and impart fewer of their own flavors during the fermentation process.
All of these decisions led to the creation of a beer style (still an Ale) with a light cracker/white bread and slight corn flavor. It had little hop character and a clean yeast flavor. This beer was actually light and crisp enough to give the American Lager a run for its money. It also had a high carbonation level. When combined with the light corniness, it earned itself the moniker “Cream Ale.” Thus, a truly American beer style was born.
Now let’s brew one.
Brewing A Cream Ale – Simone’s Golden Promise
The BJCP Style Guidelines list the stats of Cream Ale as the following:
IBU: 8 – 20
SRM: 5 – 20
OG: 1.042 – 1.055
FG: 1.006 – 1.012
ABV: 4.2% – 5.6%
Stats are all well and good but we need some meat and potatoes, or malt and hops rather.
Here is our recipe for a Cream Ale called Simone’s Golden Promise:
Grains: 8.5 lbs 2-row
0.5 lbs Flaked Barley
0.5 lbs Flaked Corn
Hops: .75 oz Willamette
Yeast: Omega West Coast Ale I (OYL-004)
You will notice our recipe uses all 2-row instead of 6-row. This was a decision we made since, despite the historical accuracy, we found that batches of this beer made with 6-row had too little flavor and body, and were not as enjoyable to drink as the maltier version. We also added flaked barley to increase the body and give a creamier mouthfeel, to really lean into the name.
For hops, we went with a historically used American hop, Willamette, a daughter of British Fuggles. There is just enough hops to balance out the malt sweetness, and largely keep hop flavor to a minimum since that is not what this style is about.
Lastly, we chose a super clean American yeast, known as the ‘Chico’ strain since it hails from Chico, California. It’s a super neutral strain, that imparts little ester character to the finished beer, despite being an Ale yeast.
That is the essence of a cream ale. I hope you enjoyed this little excursion into one of the few truly American beer styles. This is one of a series of four. As we lead up to the Olympics, sit back, drink a true American beer, and cheer on our incredibly talented athletes!
Give the gift of great beer this year! T Don’t make a “clone recipe” from some of the other guys, these are the real recipes directly from the pro-brewers out there.
Give a person a beer and they will drink for a day, teach them how to make beer and they will be happy for a lifetime! Looking to expand your brewing acumen? Why not sign up for one of our new classes Starting in January. Want to be the hero of the office or family get together? Contact the shop and schedule a private brewing event, we have several different package option available
Get Started with one of our 3 starter kit options. Our Standard kit gets you everything you need to get started. The deluxe kit upgrades your fermentation options by adding a PET carboy and finally the Ultimate option adds in a wort chiller making guaranteed to make your homebrewer smile on the big day!
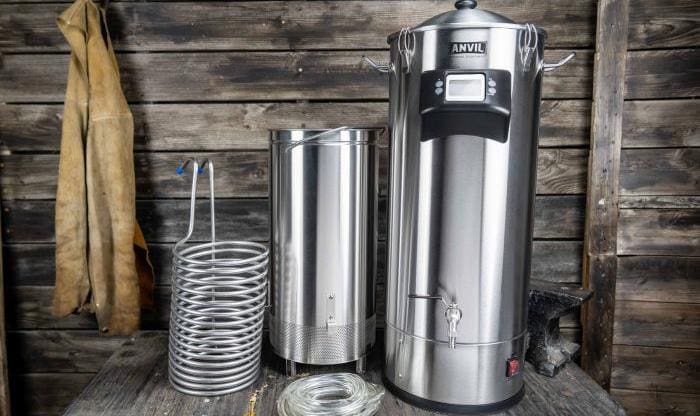
Electric Brewing has never been better. Check out our selection of all-in-one electric from Anvil. They are available in either 6.5 or 10.5 gallon systems. Order soon to ensure that they arrive in time to get under the tree.
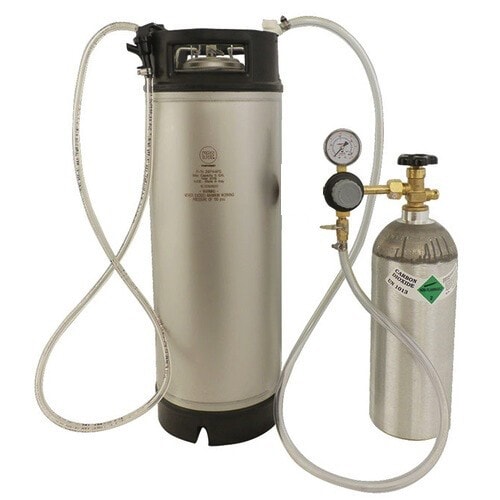
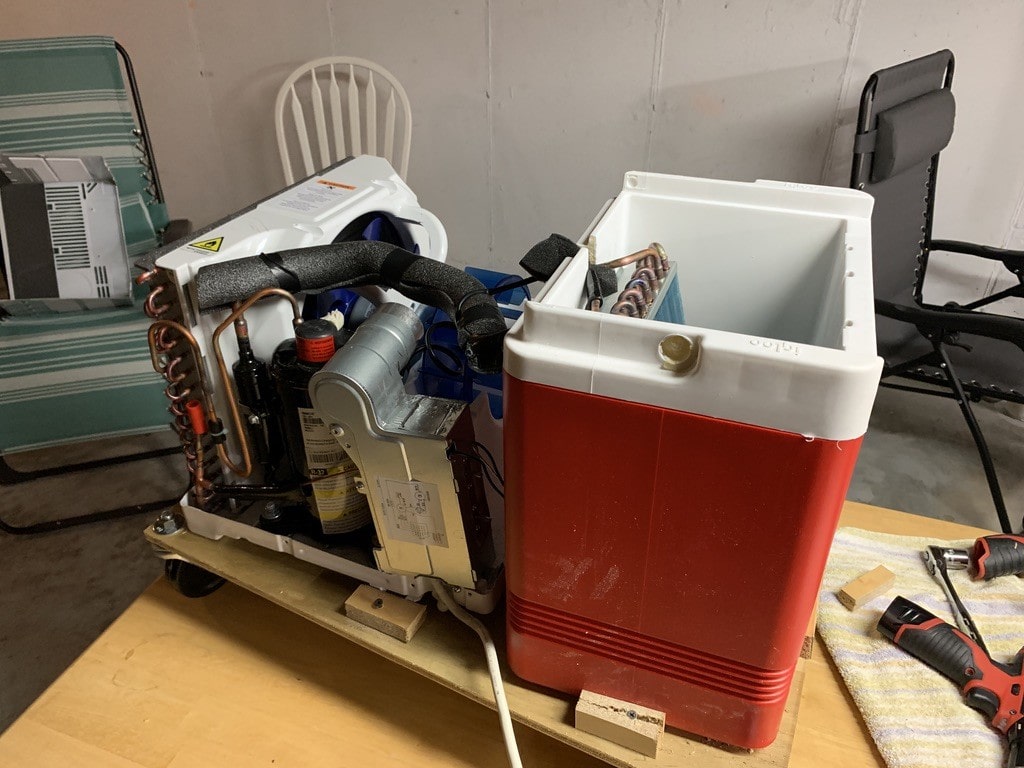
Controlling fermentation temperatures is a major improvement homebrewer’s like us can use to make better beer. Some use chest freezers or refrigerators to control temps but if you want to do what the pro’s do you need a glycol chiller. Commercial examples usually start close to $1000 but you can build your own for around $200. Some of the other homemade examples can be big but this guide shows you that they don’t need to be.
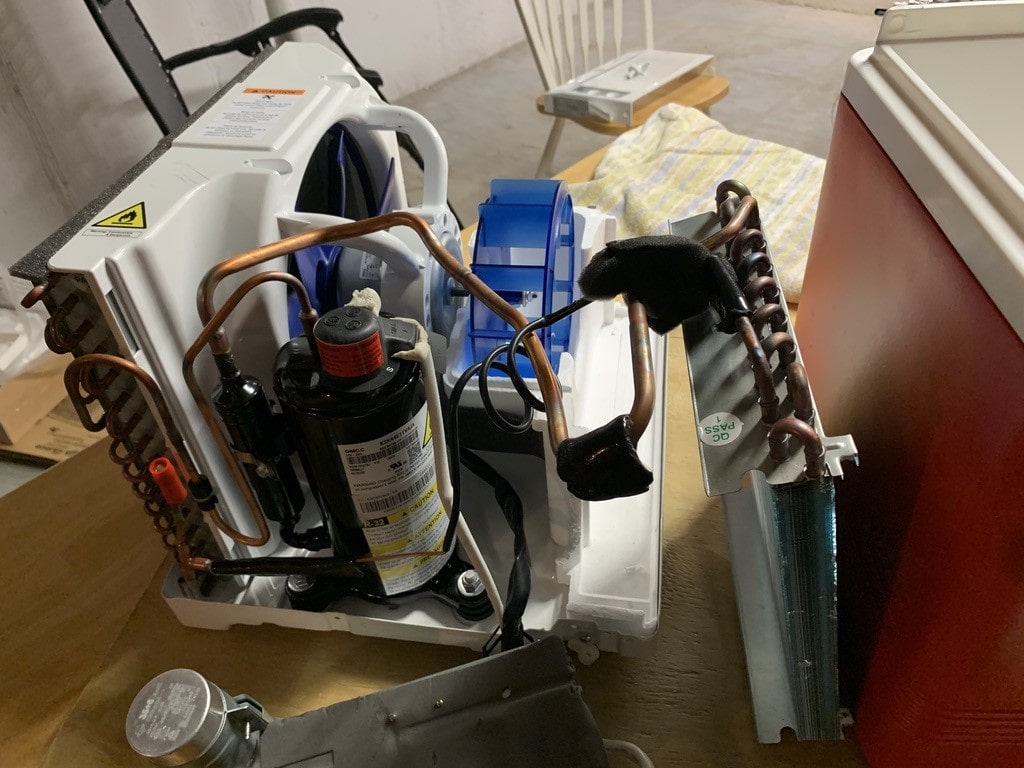
Before taking the A/C apart move the knob for fan or AC to the max cool setting. Remove all of the screws that are holding the plastic housings on the front of the air conditioner. You may need to remove the knobs as well to get the front face off the Air conditioner, you wont be using this piece again so no need to be gentle with it.
Also remove all the screws holding the back cover on and remove the back cover. You should now have something that looks like the picture to the right.
Step 2 Disable the thermostat on the air conditioner
We are going to be using a temperature controller, so we need to bypass the thermostat built into the air conditioner. First be 100% sure the air conditioner is not plugged in. Then find the 2 wires at the back side of the thermostat, remove them from the thermostat and use the wirenut and electric tape to connect the 2 wire together. (If you have never used a wire nut before here is a guide).
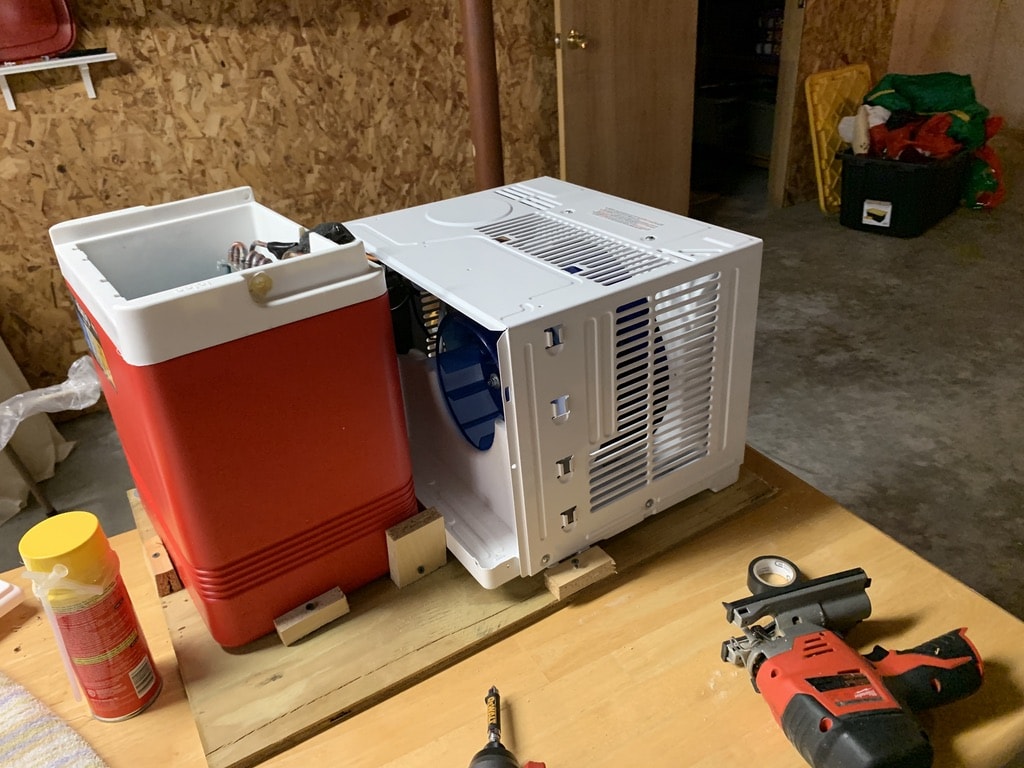
Step 3- Layout the cooler and cut plywood to size
Start off by placing the A/C unit and the cooler on the plywood then trace around them leaving a few extra inches on all sides so you have space for securing everything, castor wheel mounting etc.. then cut the plywood to size.
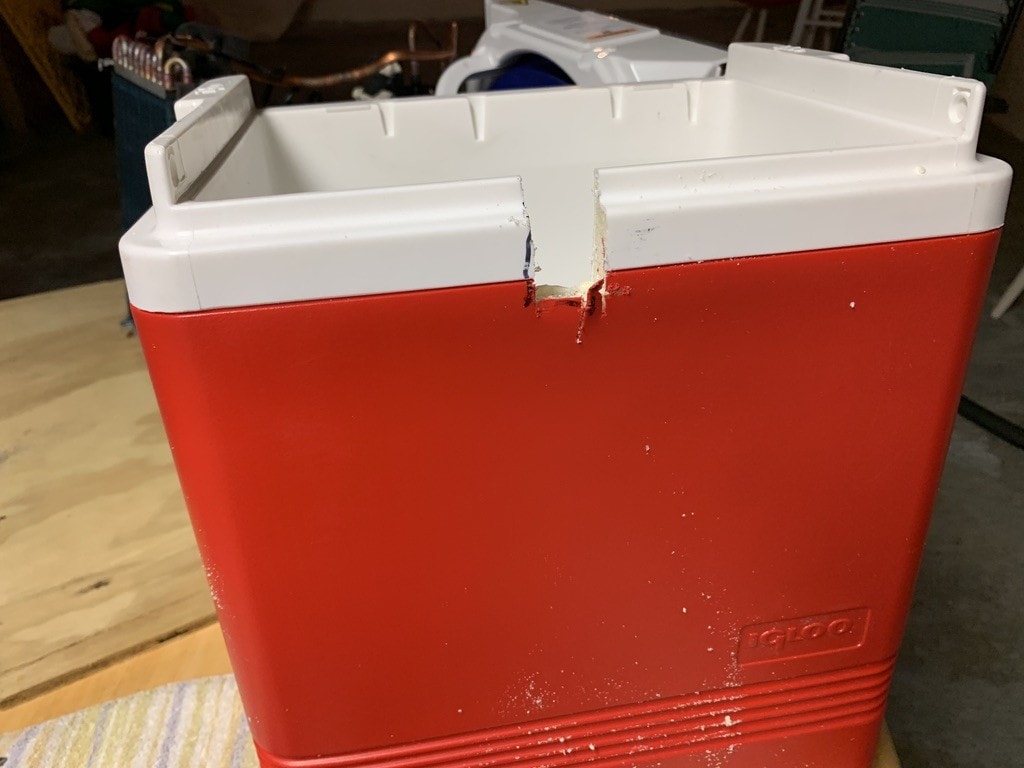
Step 4 – Cooler prep
You are going to need to make a few cuts in your cooler. First remove the lid and at the back of the cooler (the part that will sit closest to the A/C unit) you need to cut a notch for the A/C condenser lines to go into the cooler while still allowing the top to close (see picture to the right). In addition you need to cut some holes into the lid for you glycol lines to run to your fermenter.
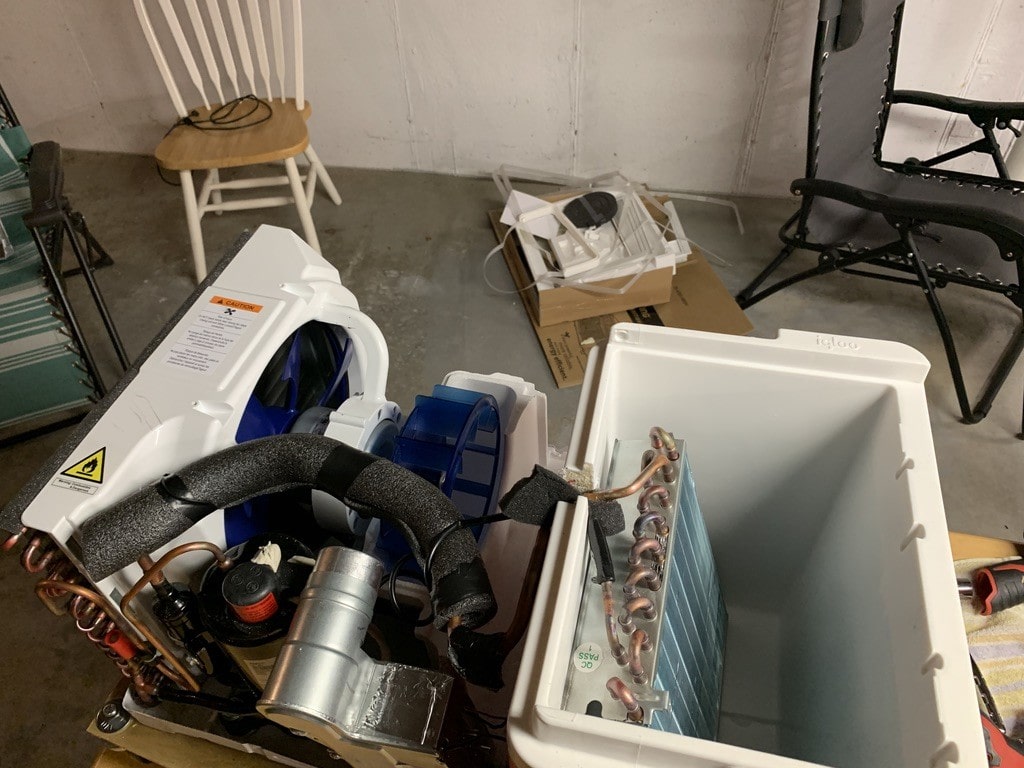
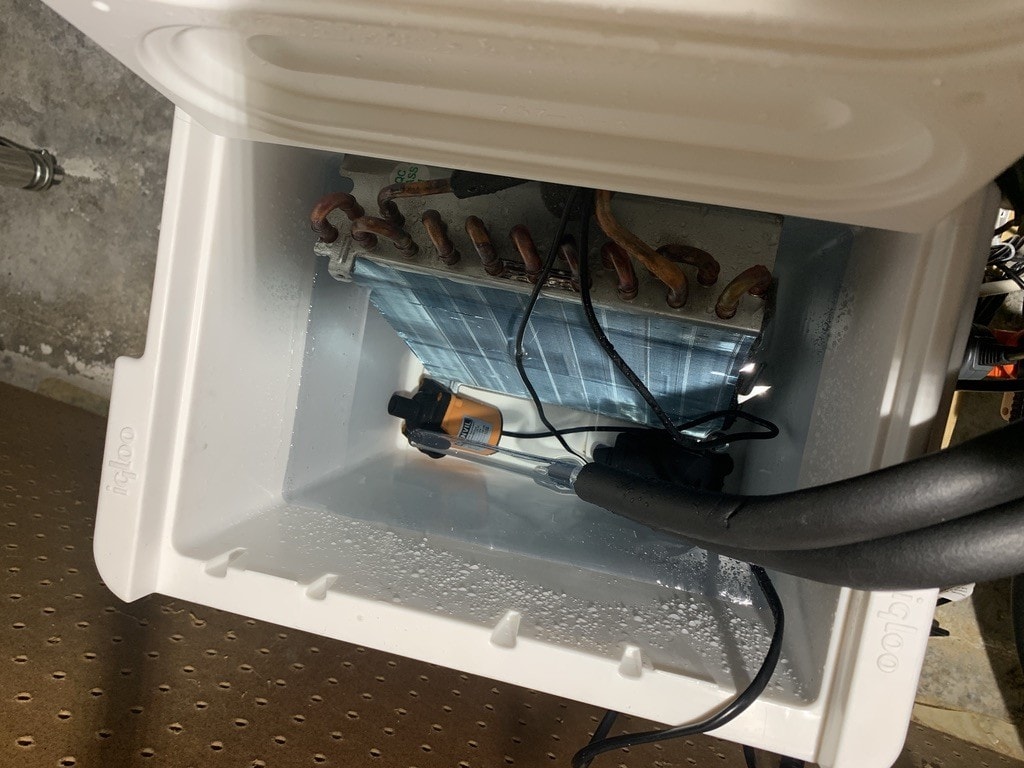
Step 5 – putting the A/C Condenser into the cooler
I put the Air Conditioner on the edge of a table for the next step. Carefully bend the copper pipes that hold the condenser (the radiator looking part on the front of the A/C unit) so that it goes from being horizontal to vertical with the pipes facing up. Next slide the cooler up under the condenser and push the Cooler and A/C back onto the table (this limits the amount of bending you need to do to the copper pipes).
One Tip: when bending pipes don’t try and bend them by moving the pieces they are attached too, bend them by grabbing the pipe in 2 places and bending (you could also use a pipe bender). This decreases your chances of causing leaks.
Step 6 – Fasten things down and attach the castors
Next up make it so the A/C and cooler do not move around, I did this by screwing small blocks of wood on all sides of the cooler and A/C. I also installed the caster wheels at this time.
Step 7- Reattach the back cover of the AC unit
You will want to re-attach the back cover of the A/C unit, it helps keep moving things covered and keeps some of the moving parts of the A/C unit stable. Also having the cover on makes it look better!
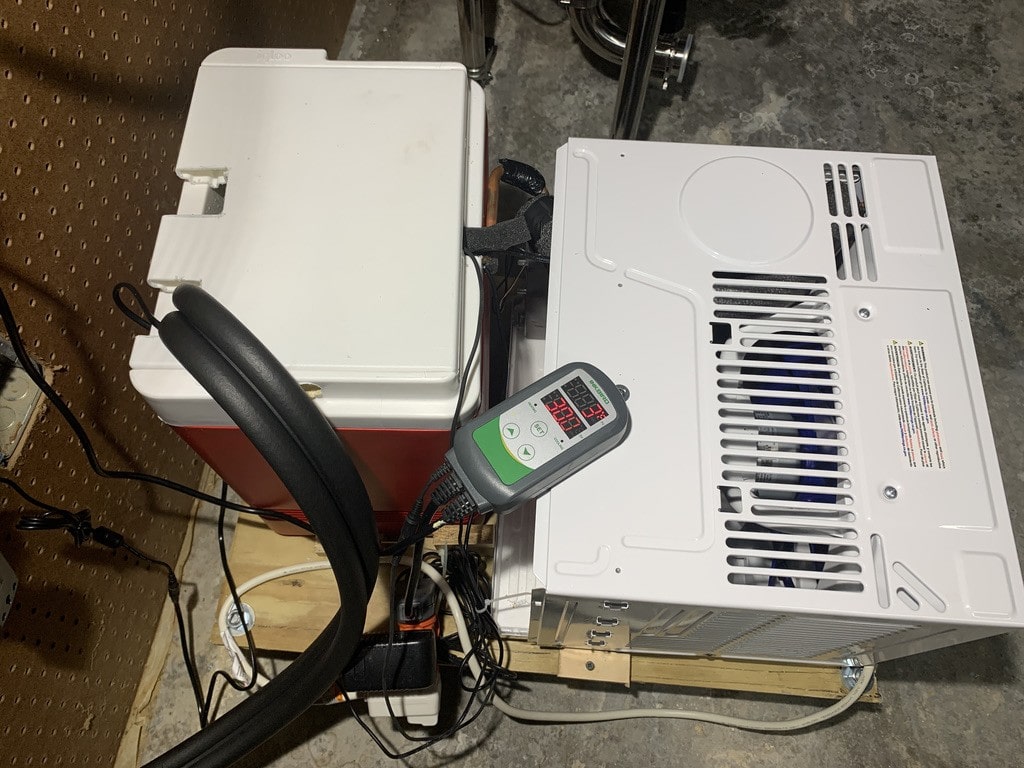
Step 8– Temperature control and pump
Set your temperature controller probe into the cooler. Also place the Anvil submersible pump into the cooler (this pump keeps glycol circulating while chilling keeping the temperature even inside the cooler). Plug your power strip or power cube into the cooling outlet of the temp controller, finally plug the A/C unit and the plug for the Anvil submersible pump into the power strip. This pump circulates the glycol around the cooler anytime the A/C is chilling which helps distribute the cold.
Step 9-mix the glycol solution
Pour in 2 gallons of distilled water and one gallon of glycol into the cooler (make sure the A/C condenser is mostly covered). One item of note you can safely go up to a 50:50 mix of glycol to water so if you want extra margin against freezing go for it.
Step 9 – Fire it up!
Its time to test it out. Plug the power stirp into the temp controller, in the temp controller and set it for 30 degrees. also set the compressor delay to 5 minutes to protect the AC unit. Your glycol should drop from room temp to 30 degrees pretty quickly (mine took 10 minutes or less).
Congratulations you now own a glycol chiller that will help you make delicious beer!
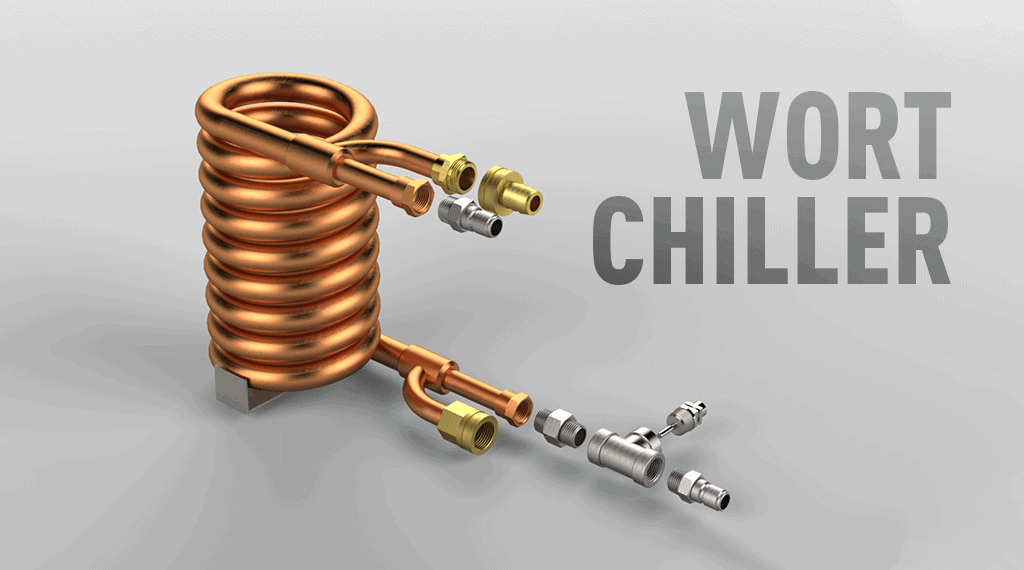
The most common upgrade a new brewer gets after making a few batches of beer is a wort chiller. There are of course DIY methods of chilling your wort such as submerging your boil kettle in a sink with ice water or sticking it out in the Snow during the winter months. These methods get the wort down to yeast pitching temperature eventually but it’s a slow process. In addition you don’t get as much “cold break” or stuff you don’t want in your beer falling out of suspension which happens when you chill the wort quickly. A wort chiller is a heat exchanger that you put in contact with the wort and chill using cold tap water. Depending on your brewing system, budget and needs there are a few different types of chillers with their pros and cons to consider.
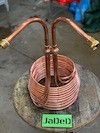
Immersion Chillers
This is the most common and simplest to use chiller. It’s a long coil of copper tubing that you submerge in the wort. We like to occasionally stir the wort during chilling to help speed up the chilling process. These can be purchased here or you can buy copper tubing and make your own.
Pro’s
Clean up is easy, just spray off with water when your done.
The most economical chilling option
Con’s
This is the least efficient at transferring heat so you will use more tap water chilling
Immersion chillers usually are only good for 5 to 10 gallons of wort.
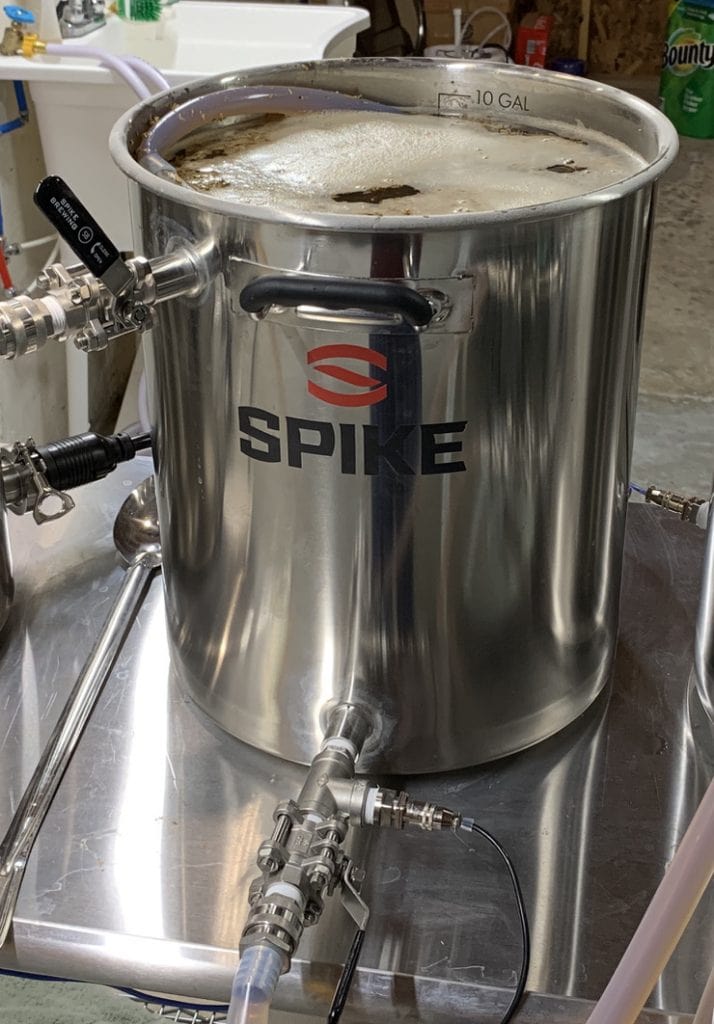
Counterflow chillers have one small tube that carries wort that is surrounded by another tube that carries cold tap water. You will need to use a brewing pump to pump the wort through the chiller. The counterflow chiller pictured to the right in from Spike Brewing and includes a temperature sensor so you can tell the temperature the wort is exiting the chiller. Having a temperature sensor allows you to transfer straight from a very hot boil kettle into your fermenter by throttling the speed the wort goes through the chiller.
Pro’s
More efficient heat transfer than an immersion chiller (less water used)
Cleaning is still relatively easy (just pump PBW and water through the chiller when done)
The pipes in most of these chillers are large enough to cope with some hop matter being passed through the chiller
Can transfer straight from hot kettle into a fermenter.
Con’s
You need a brewing pump to use this type of chiller.
More expensive than an immersion chiller
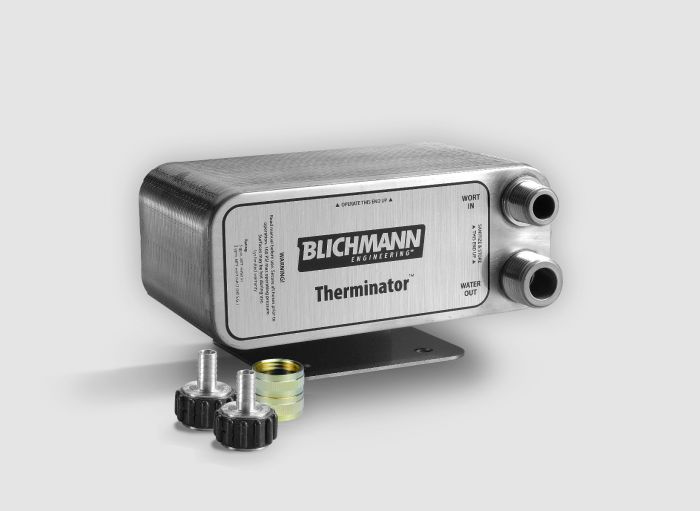
Plate Chillers
A plate chiller is made up of a lot of very thin plates of metal where cold tap water passes on one side of the plate and you pump hot wort on the other. Plate chillers are very efficient at cooling however the passages in a plate chiller are very small so you can not pump a lot of hop matter through a plate chiller without it getting clogged.
Pro’s
Most efficient chiller (lower water usage)
Priced similarly to counterflow chillers
Can transfer straight from hot kettle into a fermenter.
Con’s
Small passages cant handle large amounts of hop matter without clogging
If you don’t flush your chiller at the end of a brew-day and wort dries in the chiller it can be a pain to remove.
Conclusion
Wort chillers are one of the first upgrades most brewers consider making to improve their beer quality and brew day experience. There is a chiller out there for every need and budget you just need to decide which fits your set up the best.
There is no such thing as strong beer only weak drinkers, at least that’s why we refer to high alcohol beers as “big”. You may have dabbled with making Pale-Ales maybe an Irish Stout or a Red ale but you long to equal those commercial breweries that make imperial stouts, imperial IPA’s, or Imperial everything! Its not hard to make an Imperial beer but there are some things to take into consideration before you order 30 lbs. of Marris Otter from our store and dive in.
Yeast
Most homebrew packs are good for 5 gallons of beer up to a gravity of about 1.060. But 1.060 beers are for the lawn-mower, we want beer at 10%+ alcohol content which requires a starting gravity of about 1.100 or greater. The yeast need some help by making a yeast starter so you have more cells to ferment that big beer. As an alternative you can purchase additional yeast packs.
Use a starer for a high gravity beer
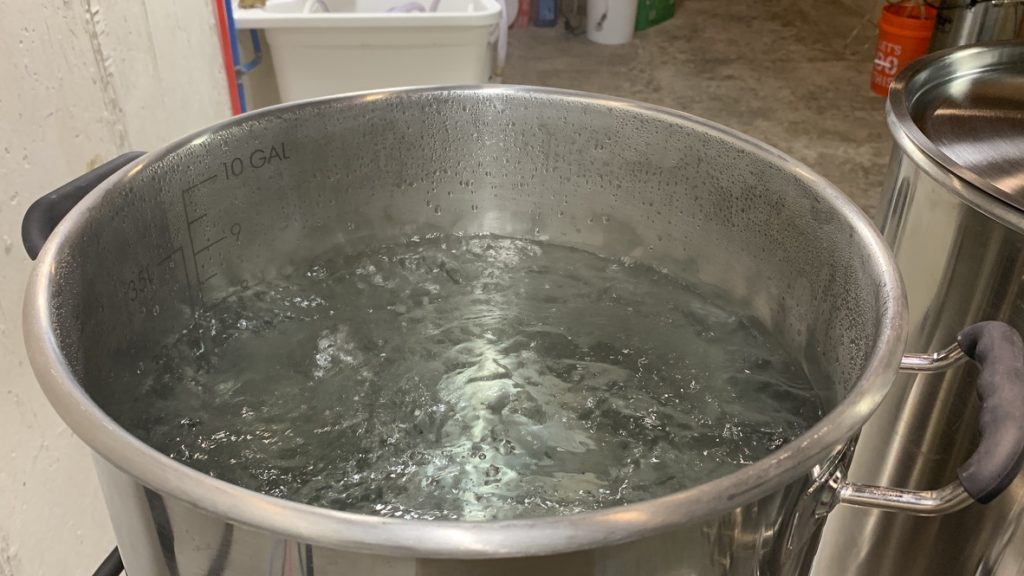
Boil Considerations
This applies for both our All-grain and extract brewers. High gravity beers have a higher chance of boil overs so watch out when that wort start to boil. In addition your hop utilization (how much each ounce of hops contributes to bitterness) is reduced with these big beers which mean you need to use more hops than normal. We recommend using brewing software or one of our made to order recipe kits so you end up with a delicious well balanced beer.
When we increase the alcohol content in our beer we also up the amount of grain. In addition to increasing the amount of grain we also extract less sugars from that grain. We usually experience an 8-10% drop in efficiency making big beers which requires even more grain. This all adds up too crunching the numbers (or making a guess!) to make sure your grain bill will fit in your mash tun.
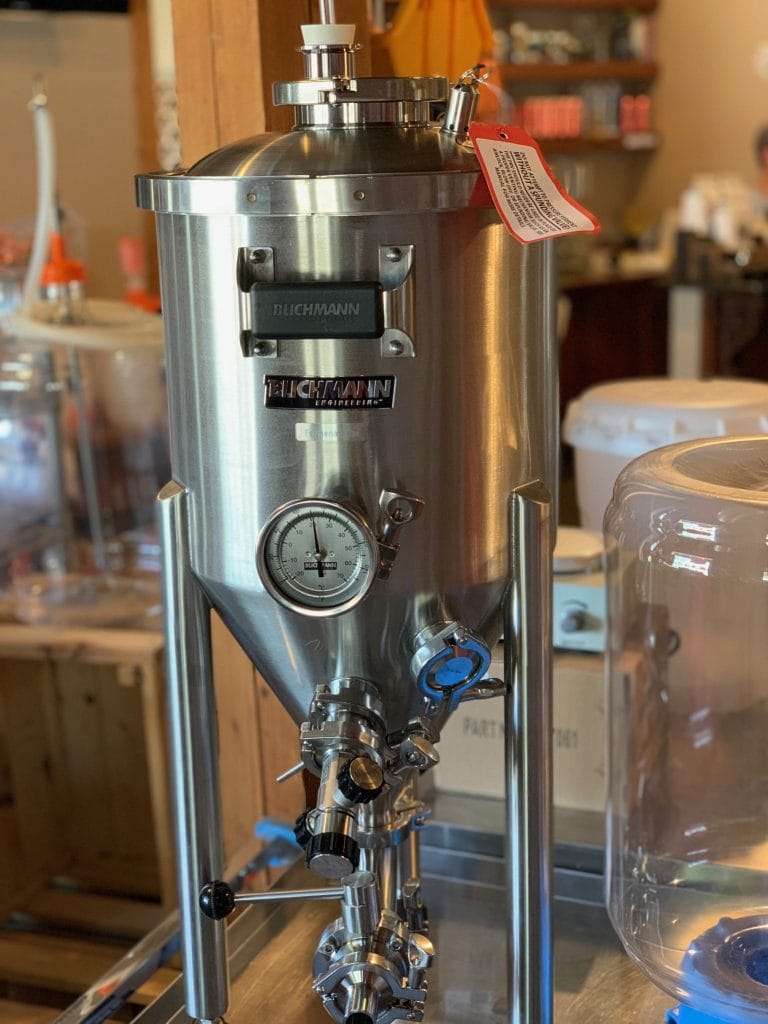
Fermentation
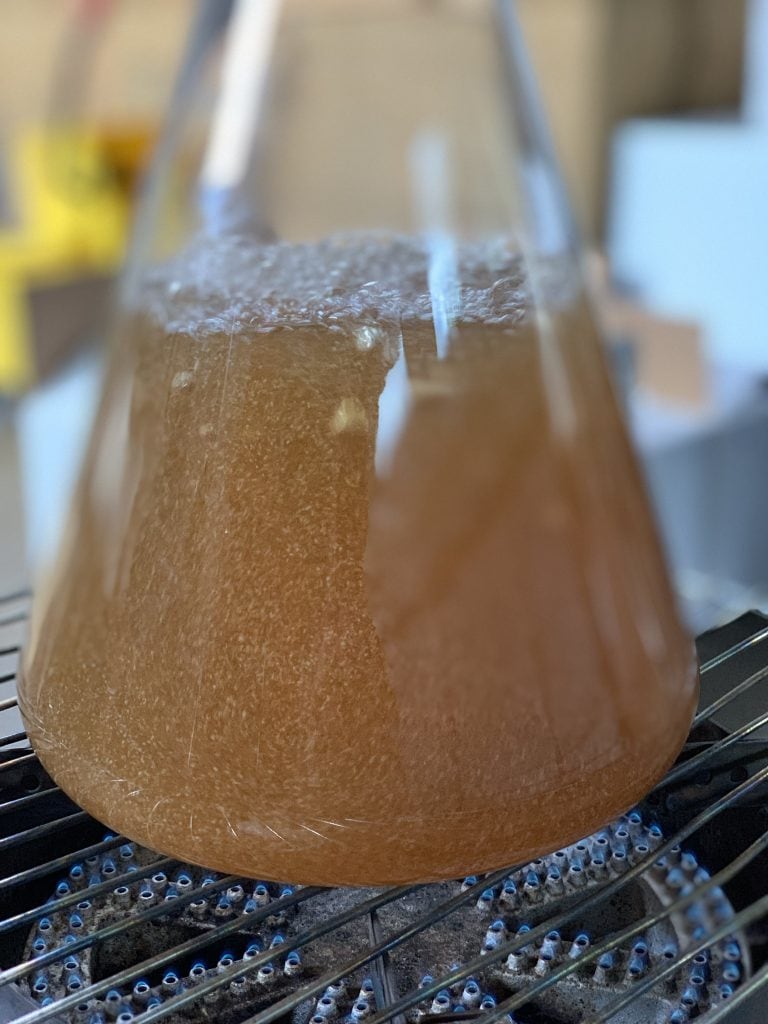
Fermentation is likely to be more vigorous than your smaller beers. This vigorous fermentation causes a few problems you need to be prepared for. First use a blow off tube instead of an airlock so that any Krausen that makes it up to the top of the fermenter doesn’t fill the airlock. Second leave some extra headspace at the top of your fermenter so that Krausen has somewhere to go. Also you can expect a significant temperature rise during your fermentation because your yeast are working overtime. You can put a wet t-shirt over the fermenter or set the fermenter in a kids pool to help keep it in the correct fermentation range.
In Conclusion
Big beers are fantastic beers to make and drink and you now know what to expect when you make them! If you have any questions give us a call we are happy to answer any of your brewing questions.