DIY Compact Glycol Chiller build
Controlling fermentation temperatures is a major improvement homebrewer’s like us can use to make better beer. Some use chest freezers or refrigerators to control temps but if you want to do what the pro’s do you need a glycol chiller. Commercial examples usually start close to $1000 but you can build your own for around $200. Some of the other homemade examples can be big but this guide shows you that they don’t need to be.
Materials list for your DIY glycol chiller
5000 BTU Air Conditioner with knob controls (not digital)
17 QT cooler (or any size that’s taller than it is wide and will fit the coil of your A/C unit)
Power Strip (anything that will split the output of the temp controller to 2 outlets and can handle 15 amps)
2 foot by 4 foot ½ inch pressure treated plywood (we will cut this down to the size needed later)
Caster Wheels
Drywall screws
Pipe insulation for ½ inch pipe
2 Gallons Distilled Water
Wire nut and Electric tape
Tools
Phillips Screwdriver
Saw that will work on wood and plastic.
Step 1 – Dis-assemble the air conditioner
Before taking the A/C apart move the knob for fan or AC to the max cool setting. Remove all of the screws that are holding the plastic housings on the front of the air conditioner. You may need to remove the knobs as well to get the front face off the Air conditioner, you wont be using this piece again so no need to be gentle with it.
Also remove all the screws holding the back cover on and remove the back cover. You should now have something that looks like the picture to the right.
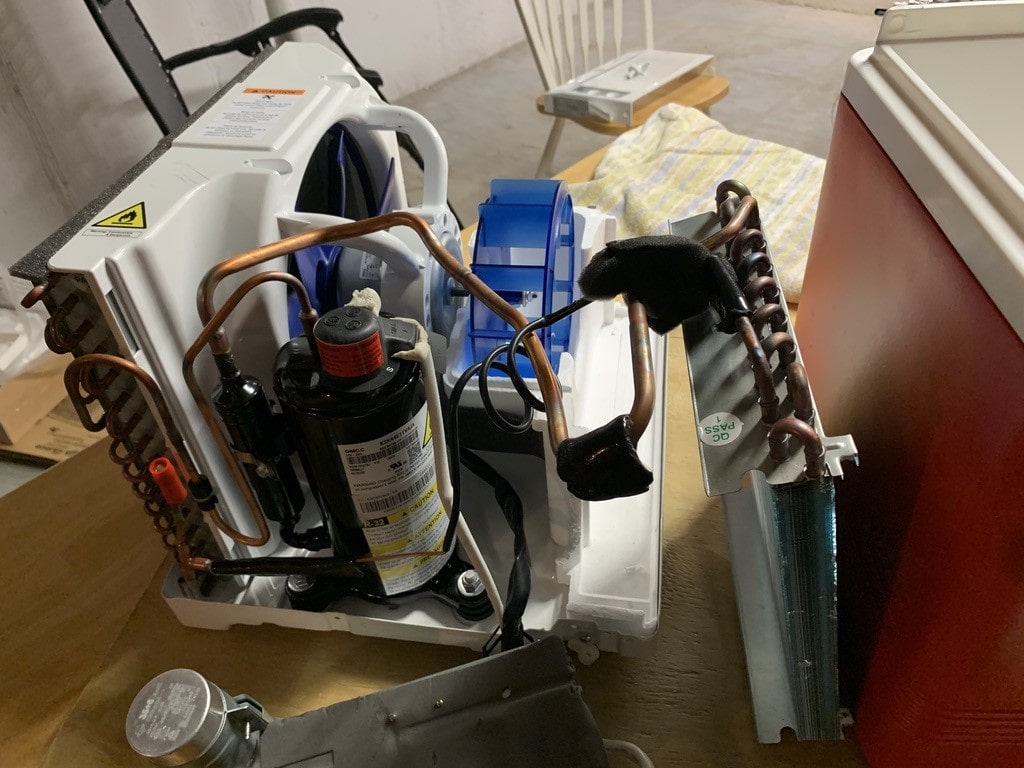
Step 2 Disable the thermostat on the air conditioner
We are going to be using a temperature controller, so we need to bypass the thermostat built into the air conditioner. First be 100% sure the air conditioner is not plugged in. Then find the 2 wires at the back side of the thermostat, remove them from the thermostat and use the wirenut and electric tape to connect the 2 wire together. (If you have never used a wire nut before here is a guide).
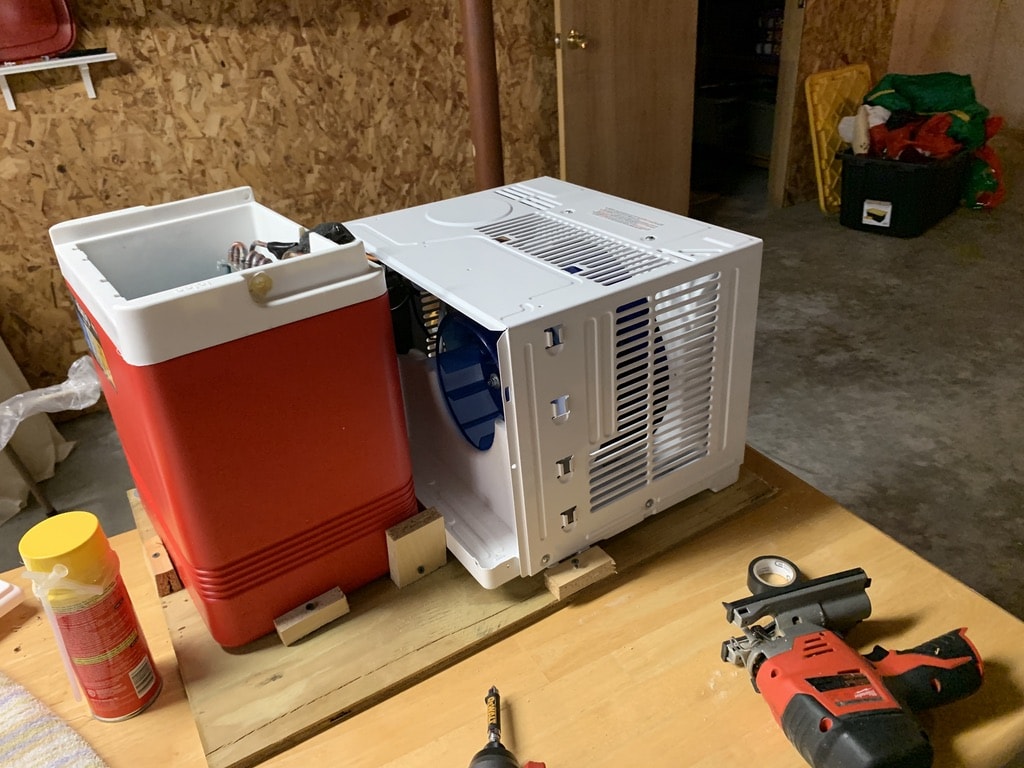
Step 3- Layout the cooler and cut plywood to size
Start off by placing the A/C unit and the cooler on the plywood then trace around them leaving a few extra inches on all sides so you have space for securing everything, castor wheel mounting etc.. then cut the plywood to size.
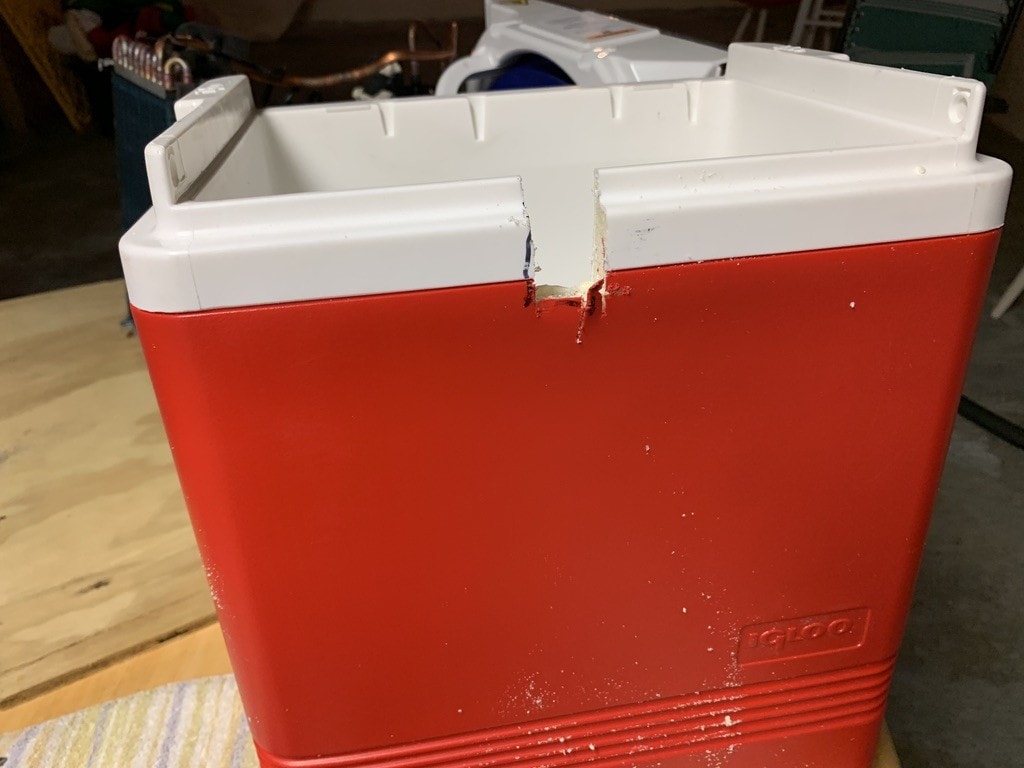
Step 4 – Cooler prep
You are going to need to make a few cuts in your cooler. First remove the lid and at the back of the cooler (the part that will sit closest to the A/C unit) you need to cut a notch for the A/C condenser lines to go into the cooler while still allowing the top to close (see picture to the right). In addition you need to cut some holes into the lid for you glycol lines to run to your fermenter.
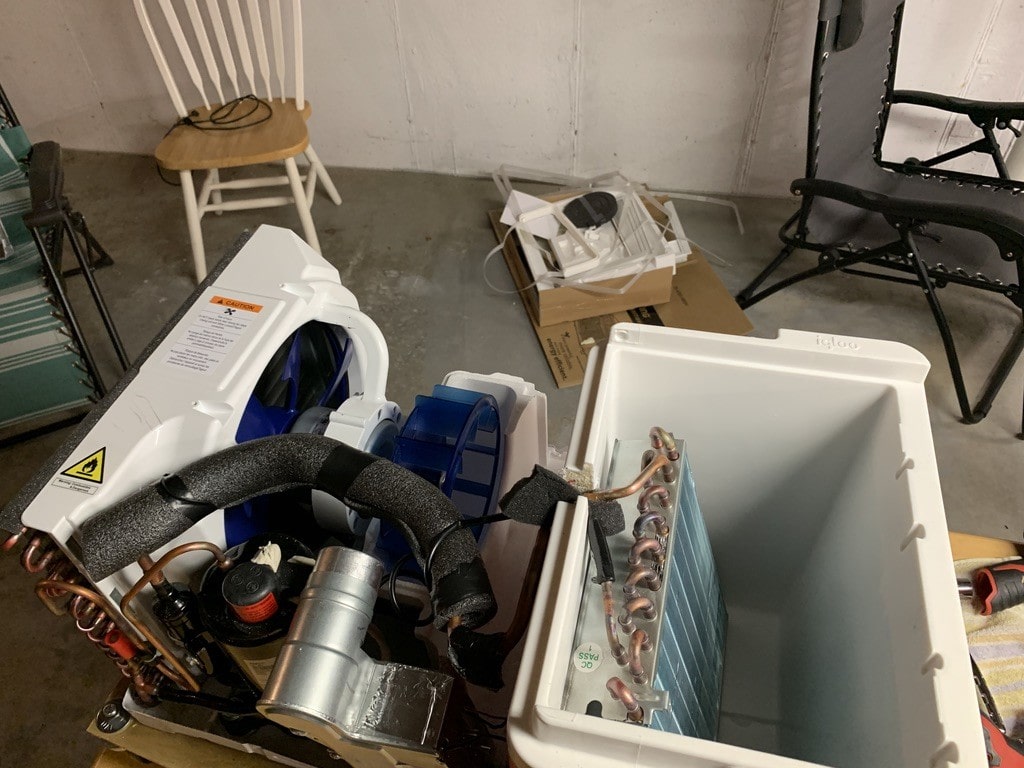
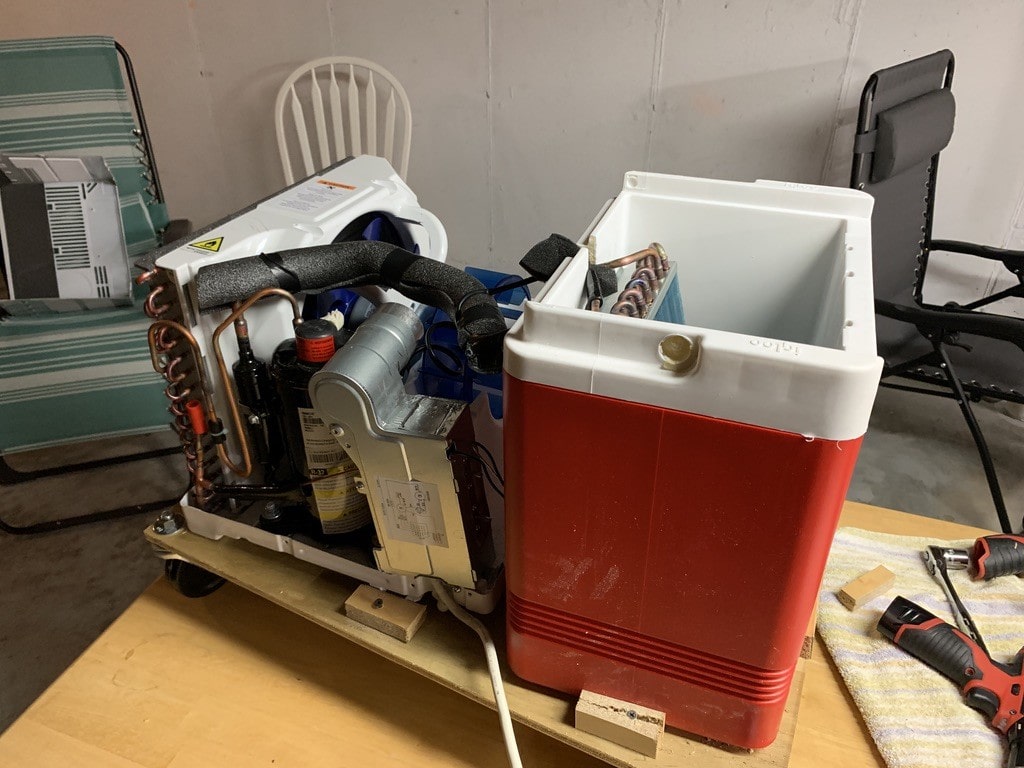
Step 5 – putting the A/C Condenser into the cooler
I put the Air Conditioner on the edge of a table for the next step. Carefully bend the copper pipes that hold the condenser (the radiator looking part on the front of the A/C unit) so that it goes from being horizontal to vertical with the pipes facing up. Next slide the cooler up under the condenser and push the Cooler and A/C back onto the table (this limits the amount of bending you need to do to the copper pipes).
One Tip: when bending pipes don’t try and bend them by moving the pieces they are attached too, bend them by grabbing the pipe in 2 places and bending (you could also use a pipe bender). This decreases your chances of causing leaks.
Step 6 – Fasten things down and attach the castors
Next up make it so the A/C and cooler do not move around, I did this by screwing small blocks of wood on all sides of the cooler and A/C. I also installed the caster wheels at this time.
Step 7- Reattach the back cover of the AC unit
You will want to re-attach the back cover of the A/C unit, it helps keep moving things covered and keeps some of the moving parts of the A/C unit stable. Also having the cover on makes it look better!
Step 8– Temperature control and pump
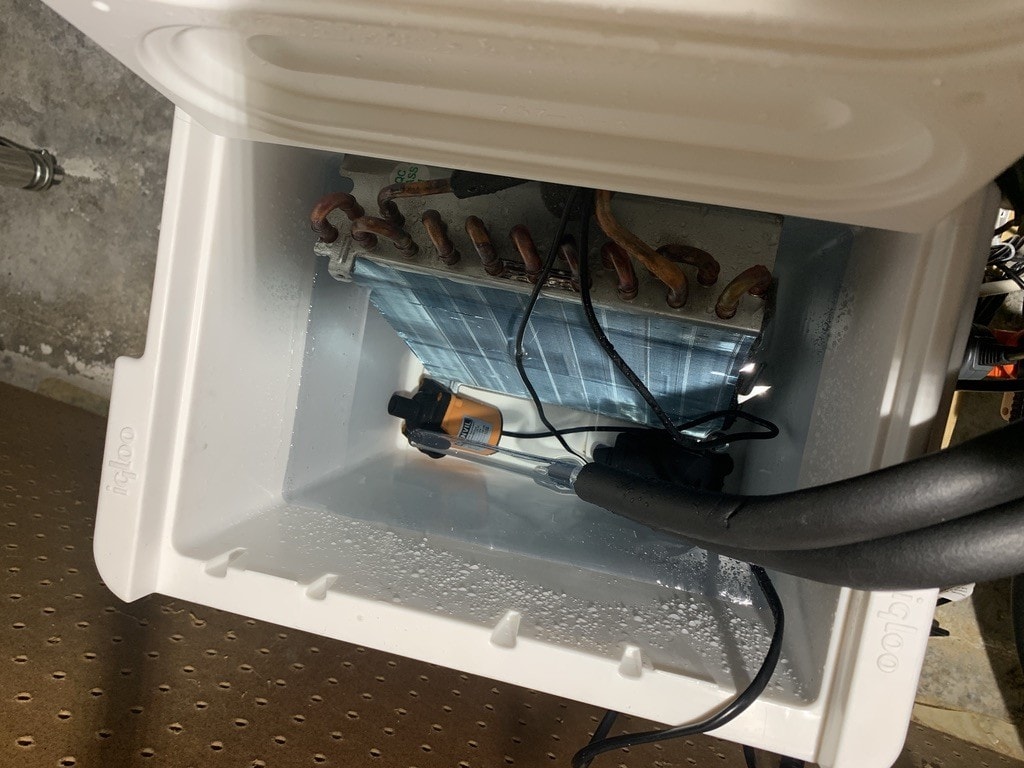
Set your temperature controller probe into the cooler. Also place the Anvil submersible pump into the cooler (this pump keeps glycol circulating while chilling keeping the temperature even inside the cooler). Plug your power strip or power cube into the cooling outlet of the temp controller, finally plug the A/C unit and the plug for the Anvil submersible pump into the power strip. This pump circulates the glycol around the cooler anytime the A/C is chilling which helps distribute the cold.
Step 9-mix the glycol solution
Pour in 2 gallons of distilled water and one gallon of glycol into the cooler (make sure the A/C condenser is mostly covered). One item of note you can safely go up to a 50:50 mix of glycol to water so if you want extra margin against freezing go for it.
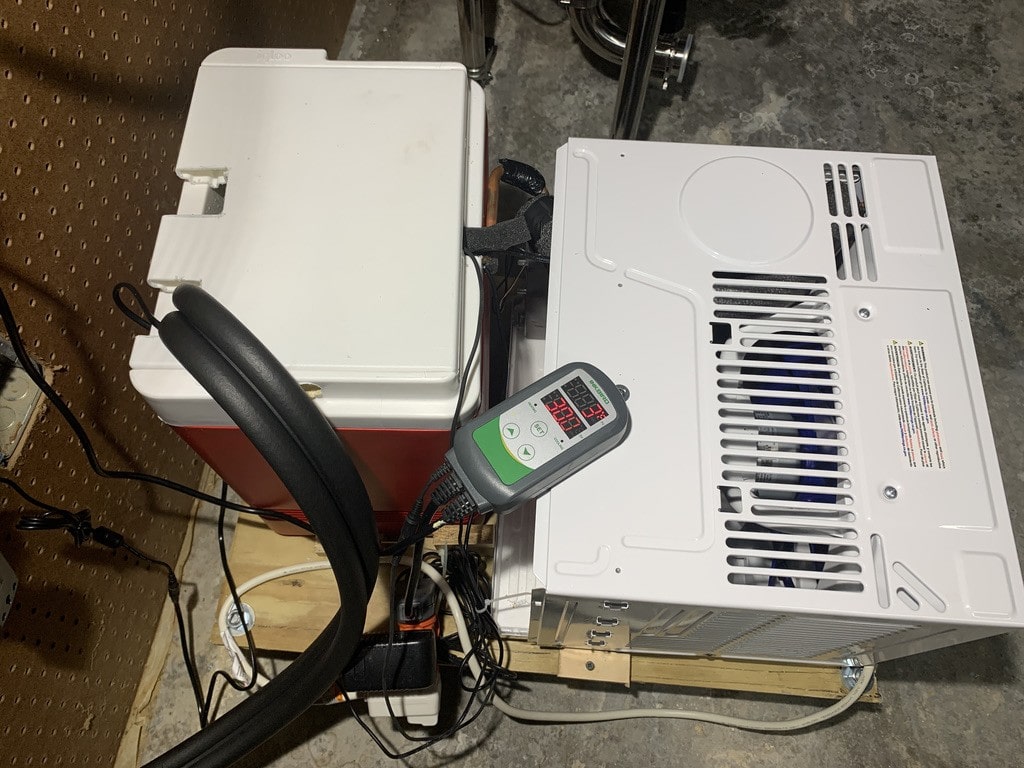
Step 9 – Fire it up!
Its time to test it out. Plug the power stirp into the temp controller, in the temp controller and set it for 30 degrees. also set the compressor delay to 5 minutes to protect the AC unit. Your glycol should drop from room temp to 30 degrees pretty quickly (mine took 10 minutes or less).
Congratulations you now own a glycol chiller that will help you make delicious beer!