Hard Seltzer Instructions
Step by Step instructions for brewing your own Hard Seltzer
This walk-thru is written for a 5 gallon batch of hard seltzer. We recommend reading through the first ten steps before beginning the process. You will need about 3 gallons of cold, chlorine-free water to use as a “top-up” after the 5 minute boil is complete, so you might want to get that prepared before beginning the process. If you have any questions, please don’t hesitate to call us at 847-816-7055.
Boiling and Cooling :
1. Fill your brew pot with approximately 2.5 gallons of water, and begin heating it.
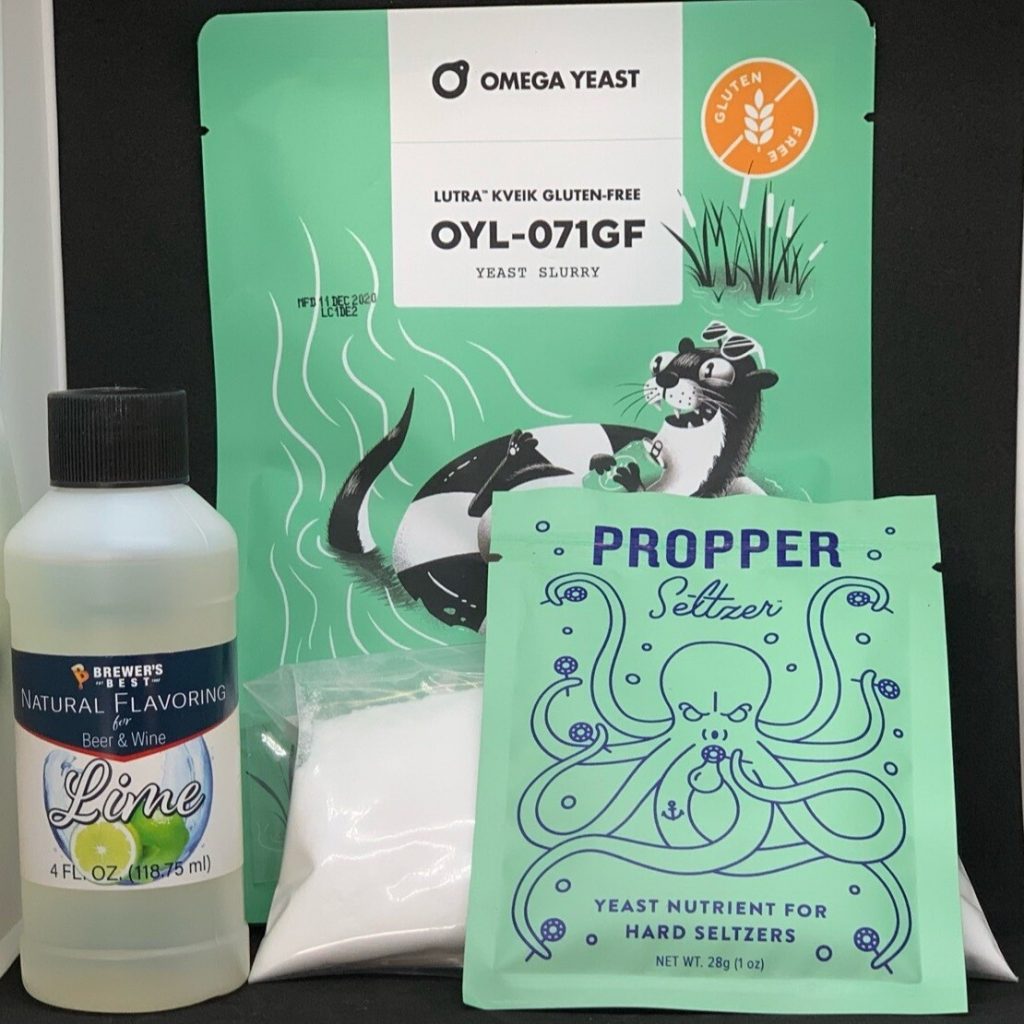
2. Pour the 4 lb bag Dextrose (corn sugar) into the warm water as it comes up to a boil and stir until fully dissolved. 3. Bring the sugar-water mixture to a boil. Allow the mixture to boil for 5 minutes.
4. When 5 minutes is up, turn off the heat – the boil is now finished.
5. Now that the heat has been turned off, add the pouch of Propper Seltzer Nutrient and stir in until fully dissolved (about 5 minutes).
6. The mixture now needs to be cooled to about 85 degrees Fahrenheit (+- 7 degrees). This can be done a few different ways:
- The easiest way is to have 3 gallons of cold, bottled water ready to go. It’s important to use either bottled water or have pre-boiled tap water ready at the end of the boil. Most tap water has some amount of chlorine in it and the chorine can negatively affect the flavor of the seltzer. You can get rid of the chlorine by pre-boiling your tap water ahead of time, so it’s up to you if you want to spend the extra time pre-boiling water or just purchase a few gallons of spring water for this purpose.
- An immersion chiller. If you already have one of these for brewing, feel free to use it as you normally would with beer.
- An ice bath. This is the most time-consuming method of chilling. Essentially, you place your pot with the hot sugar/water mixture into your sink and pour ice around it along with a bit of cold water.
7. Assuming your top-up water is cold, you should be able to mix the 2.5 gallons of hot sugar/water mixture and 2.5 gallons of cold top-up water to achieve a temperature of around 85F. The goal is to have 5 gallons total right around that 85F mark.
8. Before adding the package of yeast, you want to aerate the sugar/water mixture by shaking it vigorously for a few minutes. Place the lid on your fermenter and shake to introduce as much oxygen as possible for about 5 minutes, or however long you can handle.
9. Now that the mixture is cooled to around 85F and aerated, we can now add the package of yeast. Sanitize some scissors, shake up the pack of yeast, cut it open and dump it into the sugar/water mixture.
Ferment your Seltzer!
10. Allow the mixture to ferment in a warmer corner of the house for at least 1 week.
- Check the specific gravity of the seltzer after a week. It should be somewhere in the .996-1.000 range. If it is in that range, it is now safe to bottle. If not, try to warm the fermenter up and gently swirl the bucket/carboy to encourage the yeast to keep working. Bottling procedure is the same as with beer, if you have questions about the bottling process, give us a call or check the FAQ section on our website. In our experience, the entire 4 oz bottle of flavoring gives a nice level of fruit flavor without being overpowering. If you wish to add more, you can do so but our kits only include one jar of flavoring. Feel free to get creative here and mix up some fruit flavors.
- Once bottled, let bottles rest at room temperature for at least 2 weeks. We have had many reports of seltzer taking longer to bottle condition compared to beer. In some cases, it may take 3-4 weeks to reach carbonation. Kegging your seltzer will greatly cut down on this time and also allow for more precise carbonation levels.